Microgreens have taken the culinary world by storm, and they’re just as thrilling for gardeners.
As a tiny version of young vegetables and herbs, microgreens pack a nutritional and flavorful punch in a small package. For someone who loves both gardening and cooking, growing microgreens is a perfect blend of these passions.
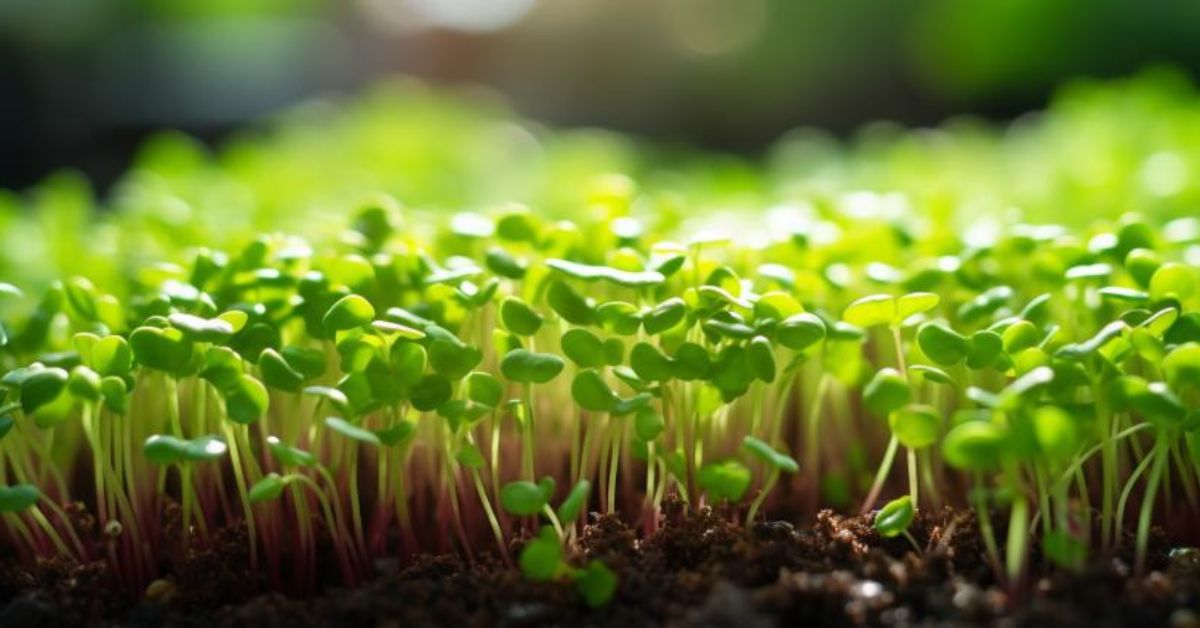
They are surprisingly easy to grow and can be harvested within just a few weeks of planting, making them an ideal crop for gardeners of all levels.
Let’s dive into the benefits of growing microgreens and explore some popular varieties.
Benefits of Growing Microgreens

1. Nutrient-Dense
Microgreens are a powerhouse of nutrition. Studies have shown that these tiny greens contain higher levels of vitamins and antioxidants than their mature counterparts. Including them in your diet can offer a boost of nutrition.
2. Space-Efficient and Quick to Grow
One of the best things about microgreens is that they can be grown almost anywhere and are ready to harvest in as little as one to three weeks. They are perfect for urban gardeners or those with limited space.
3. Culinary Versatility
Microgreens add not only a nutritional boost but also a burst of flavor and a pop of color to a variety of dishes. They can be used in salads, sandwiches, garnishes, and more, making them a favorite among home cooks and professional chefs alike.
My Favorite Microgreen Varieties
There are many varieties of microgreens, each offering a unique flavor and texture. Here are three of my favorites:
1. Radish Microgreens

These have a spicy, peppery flavor similar to mature radishes. They’re fast-growing and add a nice kick to salads and sandwiches.
2. Pea Shoots

Pea microgreens taste like young, sweet peas and have a tender, crunchy texture. They are great in salads or as a garnish and are particularly high in nutrients.
3. Sunflower Microgreens

Known for their nutty flavor, sunflower microgreens are a bit larger and have a hearty texture. They’re excellent in sandwiches and salads and are very easy to grow.
Microgreen Care
Microgreens are delightfully simple to grow and care for, making them an excellent choice for gardeners of all experience levels.
Whether you’re growing them on your kitchen countertop or in a small space in your garden, these tiny greens require just a few basic things to thrive.
Let’s delve into the essentials of microgreen care.
Planting

To plant microgreens, start with a shallow tray or container and fill it with a thin layer of soil or a seed starting mix.
Sprinkle the seeds evenly across the soil — there’s no need to space them out as you would with full-sized plants.
Lightly cover the seeds with a thin layer of soil or simply press them gently onto the surface. Keep the soil moist until the seeds germinate.
Light
Microgreens need good light to grow. A sunny windowsill or a spot under grow lights are both great choices. If using natural light, rotate your tray every few days to ensure even growth, as microgreens will lean towards the light source.
Soil
A light, well-draining seed starting mix is ideal for growing microgreens. The soil should be kept moist but not waterlogged. Avoid heavy, garden soil as it can be too dense for the delicate roots of microgreens.
Water
Watering is crucial for microgreen growth. Use a spray bottle to mist the soil surface gently, keeping it consistently moist but not soggy. Overwatering can lead to mold and mildew problems, so it’s important to find a balance.
Temperature and Humidity
Microgreens aren’t too fussy about temperature, but they generally prefer a moderate environment, around 65°F to 75°F (18°C to 24°C).
They can tolerate a range of humidity levels but do best in moderate conditions. Avoid extreme heat or cold, as this can affect germination and growth.
Fertilizer
Typically, microgreens don’t require fertilizer as they are harvested so young. The seed starting mix should provide sufficient nutrients for their short growth cycle.
If you plan to grow microgreens regularly in the same soil, you may consider adding a light, organic fertilizer or compost to replenish nutrients.
Harvesting Microgreens
Harvesting microgreens is an exciting part of the growing process, as you get to enjoy the results of your efforts quite quickly.
Microgreens are typically ready to harvest when they’ve developed their first true leaves, which usually happens about 1-3 weeks after planting, depending on the variety.
To harvest, simply snip the greens just above the soil line using a pair of scissors. Harvest only as much as you need, as microgreens do not regrow once they are cut.
Pruning
Pruning isn’t necessary for microgreens. Since they are harvested at such an early stage in their growth, the focus is more on ensuring even growth and preventing overcrowding.
Regular monitoring for any signs of mold or diseases is crucial, as these can spread quickly in the dense planting of microgreens.
Propagating
Microgreens are not typically propagated since they are harvested so young; they don’t reach the maturity required to produce seeds.
Each new batch of microgreens is grown from seeds, so to continue growing microgreens, you simply start a new batch with fresh seeds.
How to Grow Microgreens From Seed
Growing microgreens from seed is straightforward. Choose a shallow tray and fill it with a seed-starting mix. Scatter the seeds evenly across the soil surface and lightly cover them or press them into the soil.
Keep the soil moist, provide adequate light, and within a week or so, you should see the seeds sprout. Once they’ve grown their first set of true leaves, they are ready to harvest.
Growing in Pots

Microgreens can easily be grown in pots or any shallow container. Ensure the pot has good drainage and fill it with a quality seed starting mix.
The process of sowing and caring for microgreens in pots is the same as in trays. Pots are a great option for growing microgreens indoors on windowsills or in small spaces.
Overwintering
Overwintering is not a concern for microgreens as they are grown indoors and have a very short growing cycle. This makes them an ideal crop for year-round cultivation, regardless of the outside weather.
You can continuously grow batches of microgreens inside your home, providing a constant supply of fresh greens even during the coldest months.
Transplanting
Transplanting is not applicable to microgreens. They are harvested at such an early stage in their growth that they do not reach the maturity required for transplanting.
Each batch of microgreens is grown afresh from seeds in their final growing location, whether that’s a tray, pot, or other containers.
Common Pests & Diseases
Microgreens are generally less susceptible to pests and diseases due to their short growth period and indoor growing environment.
However, they can sometimes face issues like mold or mildew, especially if overwatered or grown in poor ventilation.
To prevent these problems, ensure good air circulation, avoid overwatering, and maintain cleanliness in your growing area. Regular monitoring can help you catch any issues early and take prompt action.
Growing microgreens is a delightful and fulfilling gardening venture. These tiny greens, packed with flavor and nutrients, offer an accessible entry point into gardening for novices and a quick, satisfying project for experienced gardeners.
They bring the joys of gardening indoors, allowing you to enjoy fresh, homegrown greens all year round. As you snip your homegrown microgreens to sprinkle over your dishes, take a moment to appreciate the simple beauty and bounty of nature, even in its smallest forms.
Happy microgreen gardening!