
Growing plants in pots is an art, and when it comes to Elephant Ears, it’s a delightful challenge with a stunning payoff.
As a gardening enthusiast and blogger, I’ve had my fair share of experiences with various plants, and Elephant Ears, with their lush, tropical feel, are among my favorites.
Whether you’re an urban dweller with limited space or someone who loves to add a touch of the tropics to your patio, growing Elephant Ears in pots is a rewarding endeavor.
Do Elephant Ears Grow Well in Pots?
Right Elephant Ear plants, known scientifically as Colocasia, are surprisingly well-suited for container gardening. Their dramatic foliage makes them perfect statement plants for patios, balconies, or indoor spaces.
When grown in pots, these plants can be easily moved to suit your aesthetic needs or to adjust to sunlight and temperature changes. The key to success lies in choosing the right pot size and ensuring proper care.
Elephant Ears thrive in large containers that accommodate their root growth and provide enough space for their large leaves. Good drainage is crucial, as these plants love moisture but hate being waterlogged.
Best Elephant Ear Varieties for Pots
While there are numerous varieties of Elephant Ears, not all are equally suited for pot culture. Here are three varieties that I’ve found to be excellent choices for container gardening:
1. Colocasia esculenta ‘Black Magic’

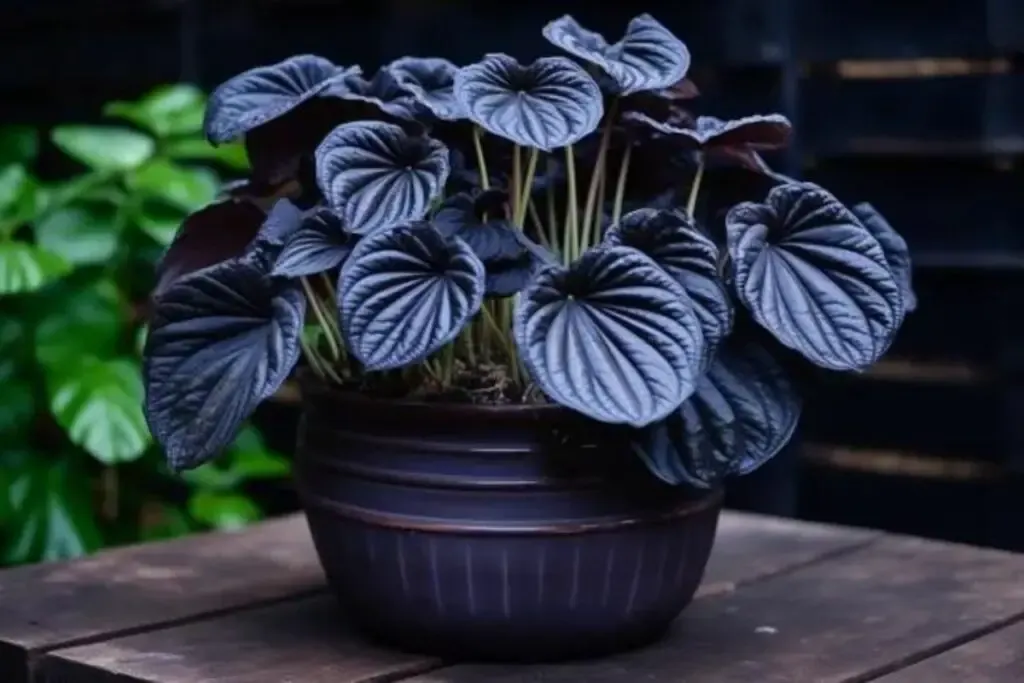
‘Black Magic’ is an enchanting variety that boasts deep purple, almost black leaves. It creates a striking contrast when paired with lighter, more traditional green plants.
This variety grows well in both shade and partial sun, making it versatile for various settings. I’ve found that ‘Black Magic’ is a real conversation starter due to its unique coloration.
2. Colocasia ‘Diamond Head’
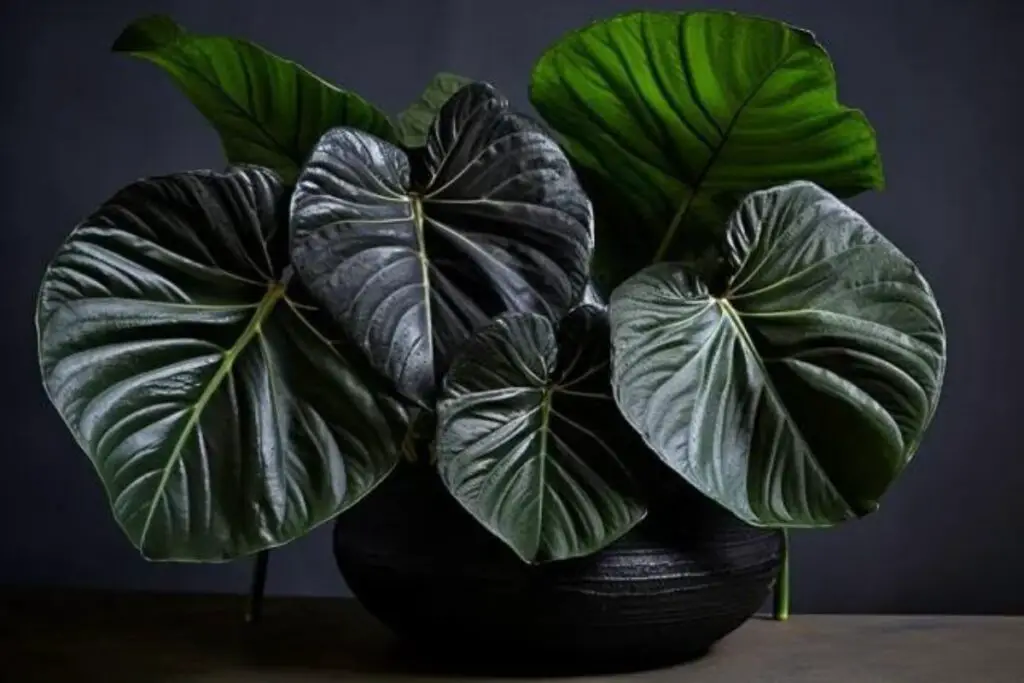

This is another variety that I personally adore. Its glossy, dark leaves have a leathery texture, and the plant exhibits a robust, upright growth habit. It’s a bit more sun-tolerant than other varieties, making it ideal for a sunny spot on your deck or balcony. This variety adds a touch of elegance to any space.
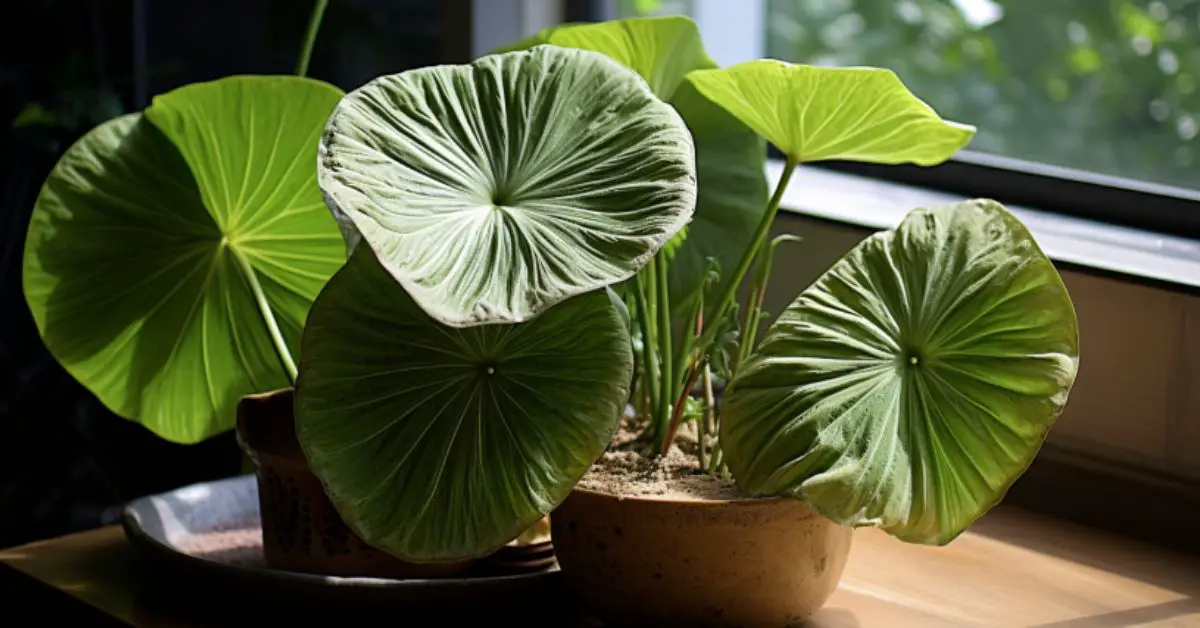
3. Colocasia ‘Coffee Cups’

‘Coffee Cups’ is known for its distinctive cup-shaped leaves. After a rain, the leaves hold water, which then spills out as the plant shifts in the breeze – a delightful spectacle!
It thrives in partial shade and adds a unique architectural element to your collection. I love the playful, interactive nature of ‘Coffee Cups’ – it’s a variety that truly brings your garden to life.
How to Grow and Care For Elephant Ears in Pots
Growing Elephant Ears in pots is an exciting journey into the world of tropical gardening. With the right care, these plants can transform any space into a lush, verdant paradise. Here are some essential tips to help you grow and care for your Elephant Ears in pots.
Planting
Planting Elephant Ears in pots is a joyful and easy process. Start by selecting a large pot with good drainage and fill it with a rich, well-draining soil mix. Plant the bulb or nursery plant at the same depth it was grown previously, usually about 2-3 inches below the soil surface.
Once planted, give your Elephant Ear a thorough watering to settle the soil and provide essential moisture for growth. With just these simple steps, you’re on your way to enjoying the lush beauty of these tropical plants in your own space!
Pot Size
Choosing the right pot size for your Elephant Ear is crucial for its growth and health. Opt for a large pot, at least 18-24 inches in diameter, to give the plant’s robust roots ample room to expand.
A spacious pot not only supports better growth but also ensures your Elephant Ear has enough soil to retain moisture and nutrients, key elements for its lush, tropical display.
Light
Lighting is a vital aspect of growing Elephant Ears in pots. These plants generally prefer a spot with partial shade or filtered sunlight, though some varieties can tolerate more sun. Finding that sweet spot where your Elephant Ear gets enough light to thrive without scorching its magnificent leaves is key.
A well-lit balcony or a patio with dappled sunlight can be the perfect stage for your tropical showstopper.
Soil
The right soil is the foundation of a healthy Elephant Ear plant. Aim for a rich, well-draining potting mix, enhanced with peat moss and perlite for that perfect balance of moisture retention and drainage. This type of soil not only nurtures the roots but also provides the essential nutrients for the Elephant Ear to flourish.
Remember, a happy plant starts with happy roots, and the right soil mix is your first step towards lush, vibrant foliage.
Water
Watering your Elephant Ear correctly is crucial for its lush growth. These plants love moisture, but they don’t appreciate soggy feet. I recommend watering deeply when the top inch of the soil feels dry to the touch. This approach ensures the roots get enough water without being waterlogged.
During hot summers, you might need to water more frequently, but always check the soil first. Proper watering will keep your Elephant Ear looking vibrant and healthy, showcasing those spectacular leaves that we all adore.
Temperature and Humidity
Elephant Ears are tropical plants, so they thrive in warm temperatures and high humidity. They prefer environments where the temperature stays above 65°F (18°C). If you live in a cooler climate, make sure to bring your potted Elephant Ear indoors during the colder months to protect it from frost.
In terms of humidity, these plants love moist air. If you’re growing them indoors, consider using a humidifier or placing a water tray near the plant to keep the air around it humid. This extra care mimics their natural tropical habitat and helps keep the leaves lush and vibrant.
Fertilizer
Feeding your Elephant Ear is like giving it a gourmet meal – it boosts growth and leaf production. Use a balanced, water-soluble fertilizer every four to six weeks during the growing season. This regular nourishment is especially important for potted plants, as nutrients in the soil can deplete more quickly.
Just like us, your Elephant Ear appreciates a good, balanced diet to stay healthy and vibrant. Remember, a well-fed plant is a happy plant, and it will reward you with its stunning foliage.
Pruning Potted Elephant Ears
Pruning your potted Elephant Ears is a simple yet essential task to keep them looking their best. Here are three key points to remember:
- Remove Yellow or Damaged Leaves: Regularly snip off any yellowing or damaged leaves to maintain the plant’s health and appearance. This not only keeps your Elephant Ear looking neat but also helps prevent potential diseases.
- Stimulate Growth: Lightly pruning the larger leaves can encourage new, fuller growth, keeping your plant lush and vibrant. This gentle trimming promotes a bushier appearance.
- Winter Care: As the cooler months approach, reduce watering and trim back the foliage, preparing your Elephant Ear for a period of dormancy. This helps the plant conserve energy for a robust return in spring.
Overwintering
When the seasons change, so do the needs of your potted Elephant Ear plants. Overwintering is a crucial process to ensure they survive and flourish year after year. Here are three important steps to successfully overwinter your Elephant Ears:
- Move Indoors: Before the first frost, bring your Elephant Ears inside to a cool, well-lit area, protecting them from the cold.
- Reduce Water and Fertilizer: Cut back on watering, allowing the soil to dry out more, and stop fertilizing to accommodate the plant’s dormant state.
- Prune and Pest Check: Trim back dead foliage to focus energy on the roots and regularly check for indoor pests, ensuring a healthy overwintering period.
By following these steps, your Elephant Ear plants will rest comfortably through the winter, ready to spring back into lush growth once warmer temperatures return. Overwintering might seem like a bit of extra work, but the reward of healthy, vibrant plants year after year is well worth the effort!
