Irises are a favorite in many gardens, known for their bold flowers, unique sword-like leaves, and ability to return year after year. But once the blooms fade and the summer heat settles in, many gardeners are unsure what to do next.
Should you cut the leaves? Do you leave the stems? What if they start turning yellow?
Knowing when and how to cut back irises can make a real difference. It helps your plants stay healthy, prevents disease, and sets them up for better blooms in the following season.
Let’s explore everything you need to know to trim your irises at just the right time, in just the right way.
Let the Blooms Finish First
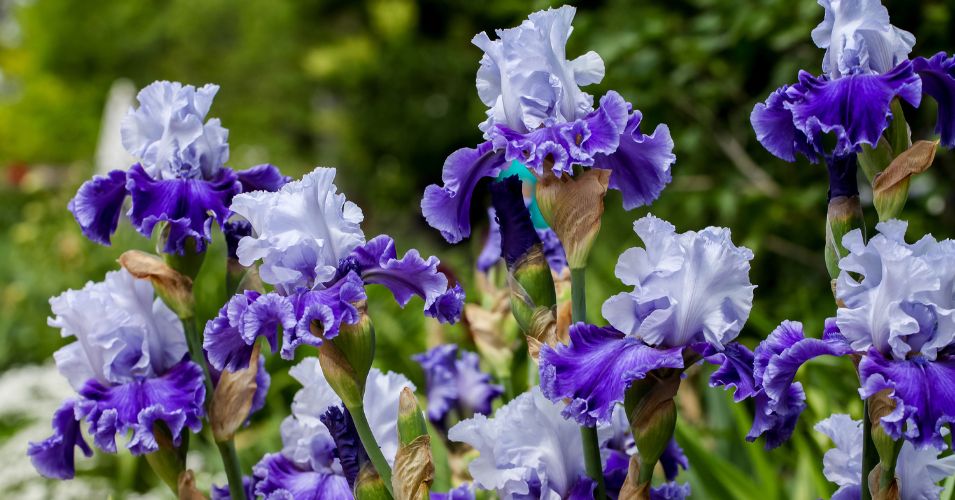
Irises put on one of the most dramatic flower shows of spring and early summer, but those colorful petals do not last long.
Once your irises are finished blooming, the first step is to leave the plant alone for a while. This allows the leaves to keep gathering sunlight and sending energy down to the rhizomes underground.
Deadheading, or removing the spent blooms, is a good idea. You can snip the flower stalk near the base as soon as the bloom fades. This helps the plant stop putting energy into seed production and instead focus on storing energy for next year.
Leave the green leaves intact, even if they look a little floppy or tired. These leaves continue to work like solar panels, powering the roots beneath the surface.
If you cut everything too soon, the plant may come back weaker next year or not bloom at all.
This period of rest after blooming is important. It gives your irises time to gather strength before any major trimming takes place.
Time the Full Cut Carefully
The full cutback of iris foliage should not be rushed.
Wait until late summer or early fall before removing most of the leaves. This is usually around August or September, depending on your climate and how long your growing season lasts.
When you see the leaves start to yellow and die back naturally, that is your sign the plant is done storing energy. The leaves will start turning from green to brown, often from the tips downward. This is a normal part of the plant’s cycle.
Cutting back the leaves too early can weaken the plant. Cutting them back too late may allow pests and diseases to hide out in the fading foliage.
The best time to cut back is when the leaves are clearly starting to dry out but are not fully rotted or mushy. They should still be firm enough to trim easily but past their peak usefulness.
If your area is prone to heavy rains or snow in fall, cutting back before wet weather sets in can also help prevent rot and fungus at the base of the plant.
Use the Right Tools and Technique
When it is time to cut your irises, use clean, sharp garden shears or scissors.
Start by removing any brown or dried leaves completely. Cut them at the base of the plant, near the soil level. If there are green leaves still standing, you can trim them back to about 4 to 6 inches above the ground.
Make each cut clean and smooth. Avoid tearing or leaving jagged edges, as this can make the plant more prone to disease.
Do not pull the leaves off by hand. This can damage the rhizomes or accidentally rip healthy tissue.
It is helpful to wear gloves while working, especially if you are dealing with thick or sticky foliage. Some iris leaves have sharp edges that can cause tiny cuts or irritation.
Clean your tools before and after trimming to prevent the spread of any bacteria or fungal spores. A quick dip in rubbing alcohol or a solution of one part bleach to nine parts water will do the trick.
Good tools and good habits make the job quicker, cleaner, and safer for your plants.
Clean Up the Debris Right Away
Once you finish cutting your irises back, take a few minutes to clean up all the trimmings.
Dead leaves can attract pests like iris borers and harbor fungal diseases such as leaf spot or soft rot. Leaving that material around the base of the plant creates a perfect hiding place for trouble.
Rake up all the clippings and remove any soft, decaying rhizome pieces that may be visible. Dispose of this plant material in the trash or compost it separately, especially if it shows signs of disease.
Clearing away the dead foliage also helps the soil breathe and lets air circulate around the remaining parts of the plant.
If your iris bed is very dense, now is a good time to gently pull back any mulch or debris that may be covering the rhizomes. Iris rhizomes like to sit just at the surface of the soil and need exposure to air and sunlight to stay healthy.
Clean surroundings are the first defense against many of the common issues that affect irises as the season ends.
Divide Irises if Crowding Is an Issue
Cutting back is often a good moment to check if your irises need dividing.
If you notice that your plants did not bloom well this year, or that the center of the clump looks bare while the edges are thick, your irises may be overcrowded.
Dividing irises helps refresh the plant and encourages better blooms in the next season.
After cutting back the foliage in late summer, carefully dig up the clump using a garden fork or spade. Gently lift the rhizomes and separate the healthy pieces from any soft, rotten, or hollow ones.
Each division should have at least one fan of leaves and a few inches of firm, healthy rhizome. Trim the roots back to about 4 inches and plant the divisions shallowly, just below the surface with the top of the rhizome exposed.
Water the new plantings well and allow them to settle before the colder weather arrives.
Dividing every 3 to 5 years can keep your irises blooming strong and prevent your beds from becoming overcrowded or unmanageable.
Keep an Eye Out for Signs of Disease
While cutting back, it is the perfect time to inspect your plants up close.
Look for signs of trouble on the leaves or rhizomes. Brown or black streaks, mushy spots, or soft areas are often signs of rot or infection.
The iris borer is one of the most damaging pests for irises. These insects tunnel into the leaves and down into the rhizomes, where they can do serious damage. If you notice holes in the leaves, slimy stems, or unpleasant smells, you may be dealing with borers.
Remove and discard any infected material immediately. In severe cases, you may need to dig up and throw out the entire rhizome.
Improving airflow, avoiding overwatering, and cutting back foliage properly can all reduce the risk of these problems.
Healthy irises are better able to resist pests and disease, and a little prevention now can save you a lot of trouble later.
Support a Strong Start for Next Season
After trimming your irises and cleaning up the bed, you can do a few extra things to support strong growth in spring.
First, consider adding a light layer of mulch to protect the rhizomes during winter. Do not smother them completely. A thin layer of straw or shredded leaves works well to keep temperatures stable.
Avoid adding high-nitrogen fertilizers in the fall. Instead, a balanced slow-release fertilizer or some compost can give the roots gentle nourishment as they settle in.
If you live in a very wet climate, make sure water is draining well from the area. Irises do not like soggy feet, especially during their winter rest.
By keeping the bed clean, trimming wisely, and avoiding excess moisture, you give your irises the best chance to rest and recharge during the colder months.
Come spring, you will be rewarded with fresh green shoots that lead to another round of bold, beautiful blooms.
Final Thoughts
Cutting back irises is not just about tidying up your garden. It is a key step in helping your plants stay healthy, fight disease, and come back even stronger next year.
Take your time, follow the plant’s signals, and give your irises the care they need after their bloom season is over.
A little effort in late summer leads to a garden full of stunning color when spring returns.
Your irises will thank you with vibrant blooms and fresh, vigorous growth.